Curb and Gutter Concrete: Calculator Guide in 2026
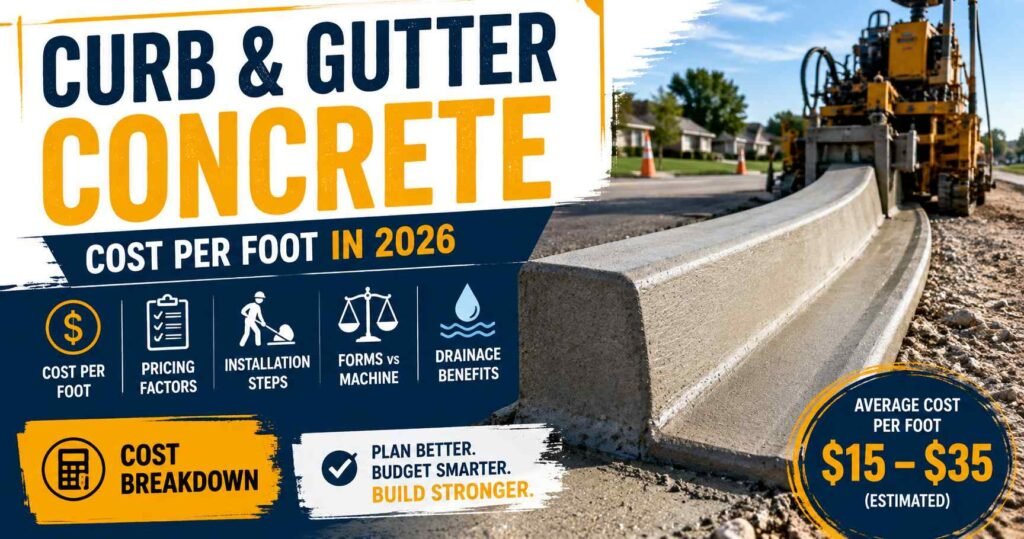
How much should you actually budget for a curb and gutter concrete project—and what costs can increase the final price? In 2026, U.S. contractors typically charged around $12–$30 per linear foot for concrete work, depending on project requirements and site conditions. Concrete pricing is only part of the budget; excavation, rebar, machinery, delivery, drainage, grading, site access, and labor. curb and gutter concrete cost depends on more than the concrete price.
Excavation adds costs for soil removal and site preparation. Reinforcement and forms increase material and installation expenses. Labor is needed for forming, placing, finishing, and cleanup. Subgrade preparation may require grading and compaction. Drainage work can add extra materials and labor.
Equipment and machinery may increase the project cost, while delivery adds transportation charges. Difficult site access can also raise expenses. Project length and curb-and-gutter size affect the amount of concrete, labor, and equipment required. This guide covers concrete quantity, preparation, installation, drainage, material costs, and questions to ask contractors.
What Is a Curb and Gutter Concrete
A curb is the raised concrete edge along a road or sidewalk. It separates the roadway from the sidewalk and helps protect pedestrians and nearby areas. A gutter is the lower channel next to the curb. It carries rainwater away from the road and helps prevent water from collecting on the surface. In many projects, the curb and gutter are built together as one concrete section, so they work as a single drainage and road-edge system.
They help organize parking areas, protect sidewalks, guide vehicles, and move rainwater toward proper drainage points. Example: In busy cities, you may notice that rainwater does not remain on the road for long. Curb and gutter concrete guide the water away and reduce surface pooling. The raised curb also helps keep vehicles from moving onto sidewalks.
How Much Does a Curb and Gutter Concrete Cost
In the U.S, curb and gutter concrete installation may generally cost around $12–$30 per linear foot in 2026. This is only a general range, not a fixed price for every project. Around $4–$8 per linear foot may go toward labor for forming, placing, finishing, and other installation work.
Basic concrete and related materials may account for roughly $4–$6 per linear foot, depending on the design and quantity. Machinery and tools can add extra charges, especially when the project requires specialized equipment.
Excavation, grading, and subgrade preparation may increase the overall cost. Larger projects may have different pricing because material quantities, labor requirements, and equipment needs change. Prices can vary between cities because local labor and material rates are different.
So, the $12–$30 range should be used for an initial budget, while the final price should come from a local contractor based on the actual project details.
Curb and Gutter Concrete Cost Per Linear Foot
Curb and gutter are usually measured by linear feet, so contractors often quote a price for each foot of work. The longer the project, the higher the total cost, while large projects may sometimes receive a lower per-foot rate.
Formula:
Total Cost = Linear Feet × Price Per Foot
For example, if you need 80 linear feet and the quoted rate is $18 per linear foot:
80 × $18 = $1,440
When comparing quotes, ask the contractor what the price includes. Some quotes may cover only basic concrete work, while delivery, excavation, drainage, reinforcement, equipment, and site preparation may be charged separately.
A clear quote showing included and extra costs makes the final budget easier to understand and helps avoid unexpected expenses.
Basic installation: 80 × $18 = $1,440
Curb removal and excavation: Add around $300–$400
Estimated final cost: About $1,740–$1,840, depending on the actual removal and excavation work.
Always confirm these extra charges with your contractor before starting.
What Factors Affect Curb and Gutter Concrete Cost
Curb and Gutter Size
The width, height, and thickness of a curb and gutter affect the total cost. Larger dimensions require more concrete. When the concrete quantity increases, the material cost also increases.
Concrete Strength and Mix
The concrete strength can also change the price. For example, 3,000 PSI concrete is usually less expensive than 4,000 PSI concrete. On the other hand, the required mix depends on local building rules and project needs. Additives and air entrainment can also increase or reduce the final concrete price.
Reinforcement
Rebar or wire mesh is not required for every project. Yet, reinforcement may be needed for areas with heavy traffic or weak soil. When rebar or mesh is added, both material and labor costs increase.
Site Preparation
Site preparation can add a significant amount to the project cost. It may include excavation, leveling the ground, compacting the soil, and adding a gravel base. If an old curb is already there, removing and breaking it up can also add extra labor and disposal costs.
Labor Rates
Labor costs are usually higher in large cities and lower in smaller cities. A difficult work area can also increase the price. Tight spaces, heavy traffic, or limited access can make the job harder and require more time.
Equipment and Formwork
The equipment needed for the job can affect the total cost. Depending on the project, contractors may need concrete tools, finishing tools, curb machines, or other specialized equipment. More equipment and finishing work can increase the overall price.
Existing Curb Removal
If an existing curb needs to be removed before installing the new curb and gutter, the project will cost more. Breaking the old concrete, loading it, hauling it away, and preparing the area for new concrete can all add extra charges.
Drainage Connections
Drainage connections can increase the total project cost. If the curb and gutter needs to connect to a storm drain or other drainage system, extra pipes and fittings may be required. This work can also require additional labor, which increases the final cost.
Site Accessibility
A tight or difficult-to-access site can make the project more expensive. If a concrete truck cannot reach the work area, workers may need to move the concrete using wheelbarrows or other equipment. This requires more labor and can increase equipment and handling costs. Extreme heat can also make the work more difficult and time-consuming.
Local Permits and Requirements
Each city or municipality may have different requirements for curb and gutter projects. Some locations may require a specific concrete strength, size, design, or inspection. Permit fees and inspection costs may also be added to the project. These local requirements can affect the materials, labor, and total project cost. Always check local requirements before starting the work.
How to Calculate Concrete for a Curb and Gutter
Step 1: Measure the Total Curb Length
First, measure the total length of the curb. Take all measurements in feet because the volume calculation will use feet.
If the curb changes direction or has different sections, measure each section separately and then add the lengths together.
Example: If one section is 30 ft and another is 20 ft, the total curb length is 50 ft.
Step 2: Measure the Curb Dimensions
Next, measure the dimensions of the curb. You need to know its width and height to calculate the concrete volume.
Use the actual dimensions of the planned curb instead of estimating them.
Example: A curb that is 6 inches wide and 12 inches high should be converted to feet before calculating the volume.
Step 3: Measure the Gutter Dimensions
At this moment, measure the gutter width, thickness, and slope. These dimensions are important because the gutter may not have the same thickness across its full width.
If the gutter has a slope, use the average thickness for a more accurate volume estimate.
Example: If the gutter is 2 inches thick at one side and 4 inches at the other, use the average thickness of 3 inches.
Step 4: Calculate the Curb Volume
Once you have the curb measurements, calculate its concrete volume using this formula:
Curb Volume = Length × Width × Height
Make sure all measurements are in feet before multiplying.
Example: For a 50-ft curb that is 0.5 ft wide and 1 ft high:
50 × 0.5 × 1 = 25 cubic feet
Step 5: Calculate the Gutter Volume
After calculating the curb volume, find the volume of the gutter.
Formula:
Gutter Volume = Length × Width × Average Thickness
If the gutter has a slope, calculate the average thickness first and use that value in the formula.
Example: If the gutter is 50 ft long, 2 ft wide, and has an average thickness of 0.25 ft:
50 × 2 × 0.25 = 25 cubic feet
After finding both volumes, add the curb and gutter volumes together. You can then convert the total cubic feet into cubic yards to estimate how much concrete is needed and calculate the material cost.
Step 6: Combine Curb and Gutter Volume
After calculating the curb and gutter volumes separately, combine them to get the total concrete volume. Calculating them separately helps reduce measurement errors and gives a clearer estimate.
Example: If the curb needs 25 cubic feet and the gutter needs 20 cubic feet:
25 + 20 = 45 cubic feet
Step 7: Convert Cubic Feet to Cubic Yards
Concrete is usually ordered in cubic yards, especially when buying ready-mix concrete. To convert cubic feet into cubic yards, divide the total volume by 27.
Formula:
Cubic Yards = Cubic Feet ÷ 27
Example: If the total volume is 45 cubic feet:
45 ÷ 27 = 1.67 cubic yards
Step 8: Add a Waste Allowance
To conclude, add a small waste allowance to cover concrete that may be lost during placement, spillage, uneven surfaces, or other job-site issues. The percentage is not always fixed; it depends on the project’s size and complexity.
Example: For a 10% allowance on 1.67 cubic yards:
1.67 × 10% = 0.17 cubic yards
So, you would plan for about 1.84 cubic yards of concrete.
Concrete Curb and Gutter Installation Process
1. Measure and Mark the Layout
First, measure the total length, width, and height of the curb and gutter. Mark the exact installation line and check the required slope so water can flow toward the drainage point. Plan control joints at suitable intervals, commonly around 10 feet, according to the project specifications.
2. Excavate the Area
Remove the existing curb, concrete, or unsuitable material. Excavate the marked area to the required depth and keep the surface clean and properly shaped for the new curb and gutter.
3. Prepare and Compact the Subgrade
Level the soil and remove soft or loose material. Add suitable base material, such as crushed stone, and compact it properly. The prepared base should be firm, level, and strong enough to support the concrete.
4. Install Forms or Prepare the Curb Machine
For formwork, install strong wood or steel forms and check their alignment and stability. If using a curb machine, follow the manufacturer’s requirements for machine setup and concrete consistency.
5. Check the Slope
Check that the curb is straight and that the required slope is provided. A typical drainage slope may be around 1–2%, but always follow local codes and project specifications.
6. Place and Finish the Concrete
Place the concrete using forms or a curb machine. Compact it properly to remove trapped air and achieve good strength. Shape and finish the curb and gutter smoothly so water can flow freely.
7. Install Joints and Cure the Concrete
Provide control joints at the required spacing. Protect the fresh concrete and begin curing properly. Keep it moist for several days, commonly about 3–7 days, depending on the mix and project requirements.
8. Final Inspection
After installation, check the alignment, dimensions, slope, joints, surface finish, drainage, and compliance with local codes before completing the project.
How Does Drainage Affect Curb and Gutter Design?
A proper gutter slope is essential for moving rainwater toward the stormwater inlet. A typical slope may be around 1–2%, but the exact slope should follow the project design and local requirements. Without enough slope, water can collect in low spots instead of draining away.
Standing water can weaken the soil below the gutter and reduce the long-term performance of the concrete. The gutter should guide water continuously along the street edge until it reaches the stormwater inlet, with no areas where water can stop. The gutter slope should connect smoothly with the inlet so water enters the drainage system properly. Existing gas, sewer, or other underground utility lines can make the drainage layout more difficult and may require design adjustments.
Uneven ground can also affect the required slope and drainage path. If the gutter is not installed correctly, rainwater may flow back toward the driveway instead of reaching the stormwater system. For this reason, always follow the approved project plans, drainage design, and applicable local requirements when setting the gutter slope.
DIY vs Professional Concrete Curb Installation
When DIY Installation Makes Sense
DIY installation can work well for a small, simple project on level ground. For example, a short 10–20 foot curb and gutter section may be manageable with basic tools and proper preparation. You should have the right tools for measuring, leveling, forming, placing, and finishing concrete.
Make sure the layout is straight and matches the required project dimensions. Proper slope is still important, even for a small project, because water must drain correctly. Follow local requirements and project specifications before starting the work.
When to Hire a Professional
Professional installation is a better choice for large or technically difficult projects. Long roads, complex drainage layouts, difficult slopes, and extensive excavation often require specialized equipment. Removing an existing curb can also require heavy equipment and experienced workers.
Professional contractors may use curb machines that help maintain consistent dimensions and follow project specifications. Drainage work can be especially technical when underground utilities or difficult site conditions are involved. Professionals are also familiar with local codes and required construction practices. Hiring an experienced contractor can reduce the risk of incorrect slopes, poor drainage, uneven curbs, and expensive repairs.
Equipment You May Need
Depending on the project, common equipment includes forms, compacting equipment, concrete finishing tools, measuring tools, and curb machines. Not every project needs every type of equipment. Simple jobs may require only basic tools, while large or complex work may need specialized machinery and professional expertise.
Frequently Asked Questions
Q: How much does a concrete curb cost per foot?
In 2026, concrete curb and gutter installation in the U.S. costs about $20–$35 per linear foot, including materials and labor..
Q: What affects concrete curb cost?
Several factors affect curb and gutter costs, including project length, size, site preparation, labor method, location, curb design, existing concrete removal, drainage connections, site access, concrete quantity, and overall project complexity.
Q: Do concrete curbs need reinforcement?
Reinforcement may be necessary in some cases, especially for heavy traffic, steep slopes, poor soil conditions, or high-load areas.
Conclusion
Before starting or finalizing a curb and gutter concrete project, use this checklist as a final verification tool. It helps you review the contractor’s quote and identify costs or tasks that may have been missed.
Total curb length measured, curb dimensions confirmed, gutter dimensions measured, concrete quantity calculated, waste allowance added, excavation included, subgrade preparation included, base material included, compaction included, reinforcement included, forms included, curing included, drainage connections included, labor costs included, concrete delivery included, existing curb removal included, disposal costs included, required permits included, traffic control included, asphalt patch-back included and final inspection included.
Use the checklist to compare every item with the contractor’s estimate. If something is missing, confirm whether it is included in another cost or needs to be added separately. This can help prevent unexpected charges and give you a clearer picture of the project’s final cost.